Sunday, February 24, 2013
Keeping Fruits and Veggies Fresh
Whenever you bring fresh fruits and vegetables into the house, from the garden, from the market or from the store, give them a short bath in cold water with a splash of vinegar for a few minutes. This kills much of the bacteria that cause decay. Then rinse them with plain cold water before putting them away. Rinsing removes any vinegary taste.
Most fruits and vegetables like a little moisture so place them in an airtight container with a few drops of water still on them.
Green beans are an exception. make sure to let them air dry before putting them away. They turn brown and black if they are stored wet.
God Bless You All!
~Grama Sue
Thursday, February 21, 2013
Grama Sue's Chili
What do you do to celebrate a blizzard? Why make chili of course! It's turning out to be kind of a dud on the blizzard scale, maybe a 2 on a scale where 10 is a serious blizzard, but I had planned to spend the day off the roads so last night I dug out enough chili beans from the store room and brought in the tomatoes and the hamburger I would need today.

I start out with 5 gallons of tomatoes, 6 pounds of ground meat (I've used hamburger, ground turkey, ground venison and ground pork. They all taste a little bit different, but all are good.) and 6 cans of chili beans.

Today, I used 3 good sized yellow onions. I usually use dried onion tops, but when I went to look for them this morning, I found I was out. I was rather disappointed. The green onion tops add some color to the chili. I used to use green peppers and the onions didn't much matter, but Grampa Tom seems to have developed an allergy to green peppers in the last year.
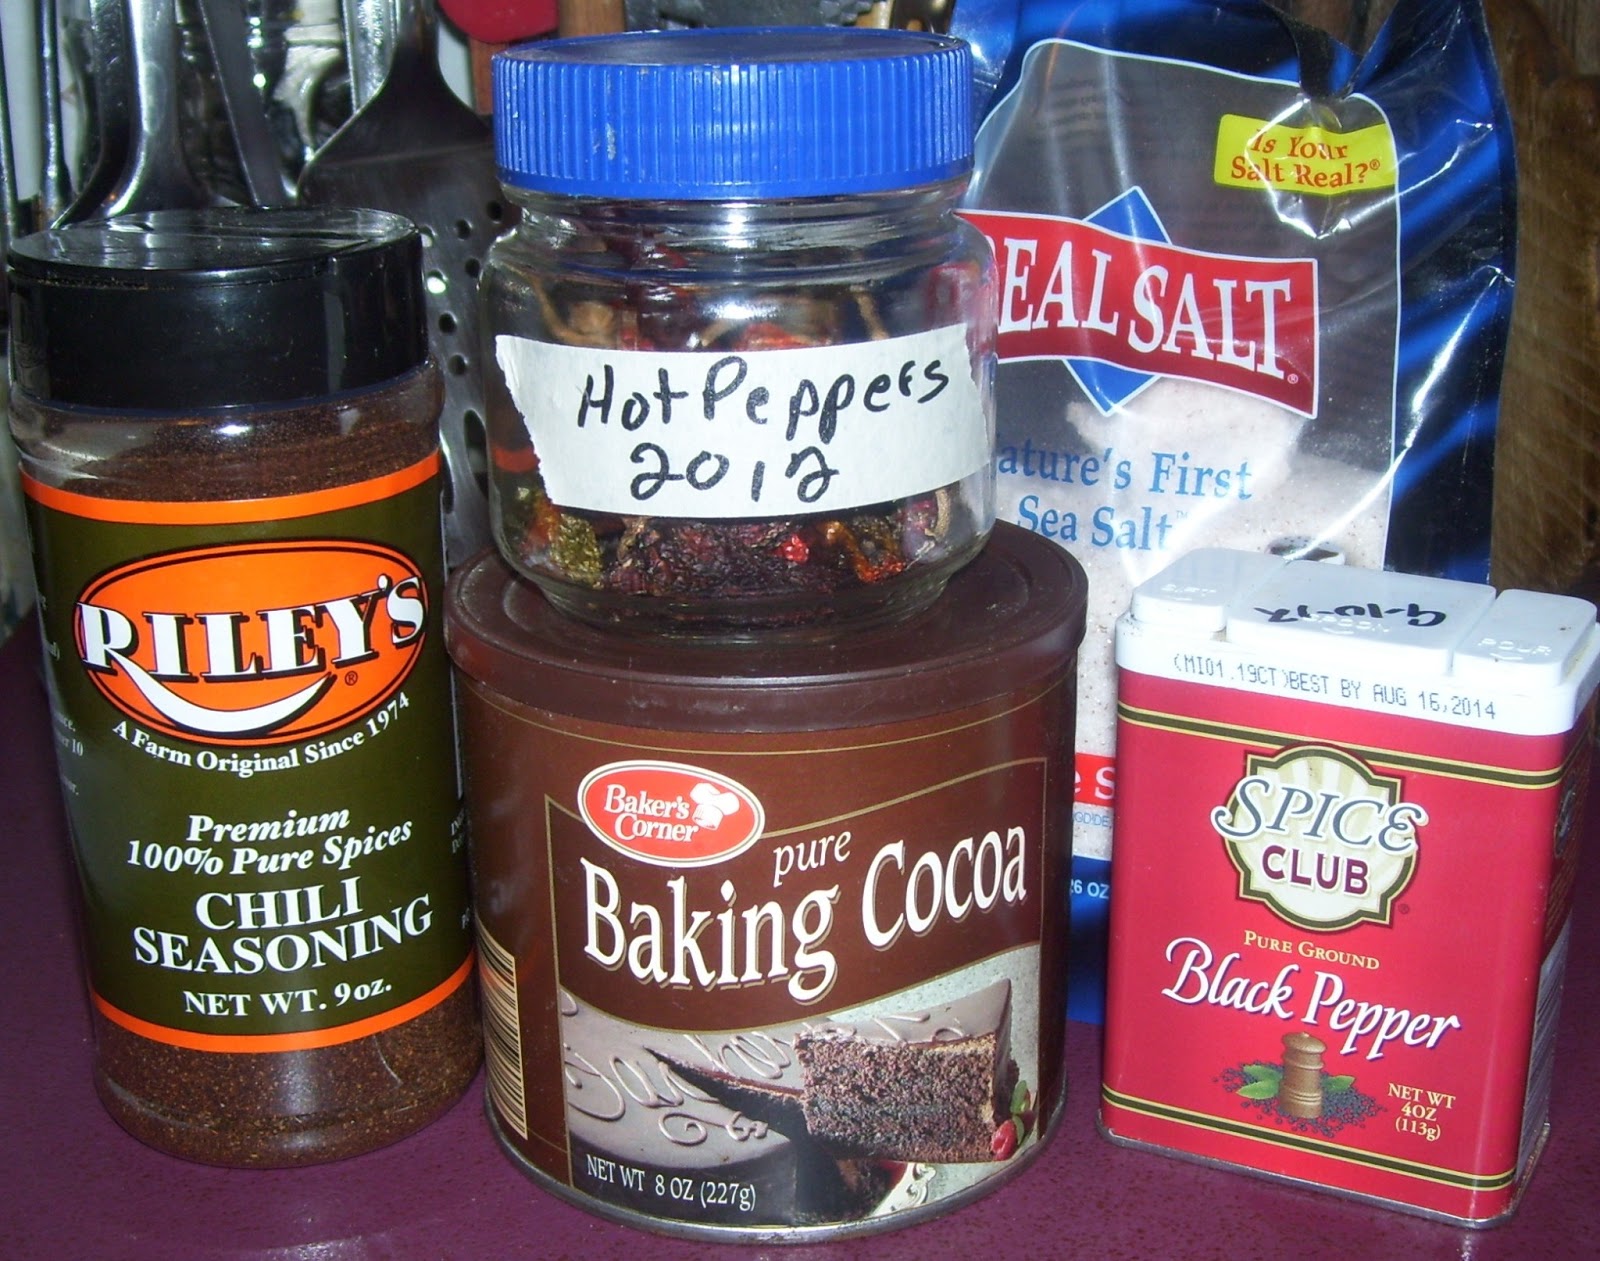
The spices I use are chili seasoning, dried hot peppers, sea salt, black pepper and cocoa. Yes, cocoa! I know it sounds weird, but years ago I found a recipe that called for it and whenever I forget it, my family really notices.
I use my heavy pressure canner pot to make the chili in because regular stock pots tend to burn anything that you are going to simmer for hours. It's kind of a pain, because I have to put all the soup in jars and then hurry up and wash it, but it just works better that way. Maybe someday I'll get another big heavy pot like this.

The first step is to thaw and brown the ground meat. I like to have all my chili done by the first part of January, but the last time I thought the weather would be right for chili, Grampa Tom reminded me that we would be getting a lot of hamburger when we butchered the cows and suggested I wait instead of buying more ground turkey. So, I waited.

The next step is to peel the tomatoes. I love the way I do this now. I just cut off the stems and any bad parts and throw them in the freezer. When I go to use them, I just put the tomatoes in warm water and the skins slip right off! Don't even need a knife.

I put the tomatoes whole into the pan with the ground meat. Some people would puree the tomatoes and the onions, but I like my soup chunky.

Then I put in the beans. Someday I'm going to grow a bunch of kidney beans and figure out how to season them to make my own chili beans, but I haven't got there yet.

I also need to figure out how to make my own chili powder. I'm sure we grow all of the ingredients. Goals, goals, goals. Oh, sorry. Rabbit trail. I add 3 tablespoons of sea salt, 1 tablespoon of black pepper, and 5 heaping tablespoons each of chili powder and cocoa powder.

Then I chop up some hot peppers and add them. I'm not real picky about what kind they are. I think today I ended up putting in a combo of jalapeno, chilies, cayennes and habaneros.
I also chopped up the onions and threw them in.

And then I let it simmer for several hours.

Once the tomatoes are falling apart, I hot pack the chili into quart jars. I think this recipe makes about 12 quarts, but I've never made it without feeding my family before doing the canning. I pressure can the jars at 10 pounds for 90 minutes. If you left the meat out and used only red tomatoes, you could get by without a pressure canner and just add the meat later.
I like to have lots of chili on hand. I use it for more than just soup. Lots of times I'll add a bit of flour to it to thicken it up.

And use it for filling for tacos.


Or in taco salad.

Sometimes I just drizzle chili on tortilla chips, add some cheese and pop it in the microwave for quick nachos. Don't have a picture of that though.
I know, using chili for these things is a little weird, but it's quick and it's easy, it's filling and it tastes good! On a busy day that's just important!
God Bless You All!
~Grama Sue
Monday, February 18, 2013
Grama Sue's Meatloaf
It's true. There are as many different ways to make meatloaf as there are people who make meatloaf and mine is no exception!

My basic ingredients are a pound of hamburger, an egg, a medium onion, oatmeal, salt, pepper, Woshestershire sauce, ketchup and mustard.

I chop the onion and add the egg, about 1/4 cup Woshestershire, 1/4 cup of ketchup, and about 1/8th cup of mustard. I also add a teaspoon of salt and a teaspoon of pepper. Sometimes I might add chopped peppers or chopped olives. And occasionally I will add some chili powder or some Italian type seasonings like basil or oregano. Just depends on what I'm feeling like.

Then I mush it all together. You could use a spoon, but I really think that fingers do a much better job of squishing all the ingredients together. It's messy and there's definitely an "ewww" factor, but it does the job.

I only use one hand because I want the other hand to stay clean so I can grab oatmeal from the container. I use enough oatmeal to firm up the mixture so that it makes a nice loaf. Tonight, it took 3 handfuls. The size of the egg and how much of the other liquid ingredients I use make the oatmeal amount vary.

Now here is where my meatloaf really differs from everyone else's. I put it on a broiler pan. When Grampa Tom and I got married there was this crazy lady who was preaching that eating fat was the cause of being fat. She advocated totally eliminating fat from the diet, and the government food guidelines said the same. In fact, the eating of meat (especially red meat) was demonized as the cause of heart problems along with a host of other health issues. I bought that whole line of thought and wound up with diabetic symptoms as a result. Fortunately, Grampa Tom talked me into trying the Atkins diet when I was about to go to the doctor. I lost tons of weight on the Atkins diet and all the symptoms went away!
Ooops! Rabbit trail. Anyway, back then, I was feeling guilty for indulging in meatloaf occasionally so I placated my guilty conscious with putting my meatloaf on a broiler pan so the fat could drain off. I still can't stand the thought of letting my meatloaf float in the fat in a bread pan like most people do.
If you do this, ALWAYS fill the pan with water! The fat dripping on a dry pan will cause your house to fill up with smoke! Yes, I do know this from expierence :) There are a couple of extra advantages to cooking your meatloaf this way. #1 You can flatten your loaf more than you can in a bread pan. A flatter loaf cooks quicker and uses less energy. #2 You don't have to cover the meatloaf when it is cooking. The water under the loaf keeps it nice and moist. I've never had a loaf pan with a lid on it, so covering for me involves aluminum foil. This method has saved me a ton of money for aluminum foil through the years.
I put the meatloaf in the oven and cook it at 450 degrees until it is nice and brown on top. This takes about 30 minutes in my convection oven, 45 minutes in my regular oven.

Once it is browned to Grampa Tom's satisfaction (He likes his meatloaf almost burnt) I pull it out and cover it with grated cheese.

Then I return it to the oven for a few minutes to melt the cheese. Yum yum!
Yes, this is yet another by guess and by golly recipe! Exact measurements just grate against my creative personality. If you like my methods, hop on over to my recipe page. I am trying to compile all the recipes I put on this blog over there so they are easier to find.
God Bless You All!
~Grama Sue
The broiler pan I use when I'm just feeding Grampa Tom and I is a mini broiler pan. Fits perfect in my little convection oven!
Wednesday, February 6, 2013
Potato, Ham and Broccoli Soup
Another by guess and by golly recipe :)
To begin with, put a meaty ham bone, several chunked potatoes and a large chopped onion in a dutch oven. Then cover half way with water and season with salt and pepper.

Bring to a boil, cover and let simmer for a couple of hours, stirring occasionally.

When the ham is falling off the bone, remove it. Take off any meat that is still clinging to it. If the meat chunks are bigger than you like cut them up a bit before returning it to the pan.

Then you will need some frozen broccoli, 2 cups of milk and several slices of processed cheese spread. You can use other types of cheese if you want, but processed cheese tends to melt best.

Chop the broccoli into bite sized pieces if needed and add it to the pan. If you are using fresh broccoli it is best to add it about an hour before it is done simmering. Bring it back to a boil and let simmer for another 10 to 15 minutes. If there is to much water, keep simmering until the water looks like this.
Tuesday, February 5, 2013
How I Make Tea
Caffeine is a food group. Unless someone comes up with something better, I'm gonna stand by this statement. Many years ago, I was listening to all the garbage about how bad caffeine was so I decided to give it up. A couple of years later in January I was downing the asthma meds like it was the middle of July. It occurred to me that I didn't have that much of a problem in January when I was drinking caffeine, so I went back on it and was much better in about 3 weeks. Caffeine doesn't have near the side effects as asthma meds and since then I've found out that before prescription meds were illegal to buy without a prescription, caffeine was the drug of choice among doctors for asthma.

I start by heating filtered water on the stove. While it is heating, I get my pitchers out and visit my herb garden.

I generally make 2 pitchers at a time. And no I didn't go steal a pitcher from a bar. I bought these at a Good Will store up by Chicago for $3 each.

I go out to my lemon balm patch.

I cut a handful for each pitcher I am making.

Or I might get some lemon grass. Both of these herbs have some powerful antioxidants going on. I use the lemon balm for canker sores and lemon grass is known for it's ability to aide in the shrinking of tumors. Sorry I don't have enough of these marvelous herbs to share. I am working on that for next year.

If I'm using lemon grass. I cut 5 or 6 blades for each pitcher. I decided to use both for this blog post.

I rinse them off in the sink.

Then I get out 7 tea bags for each pitcher. I'm not known for my delicate palate, but I think Aldi's has some pretty good black tea and I'm cheap so that's what I get!

I wrap the tea bags around the herbs.

And place them in the pitchers.

Then I add some hot water to each pitcher and let it steep for about 5 minutes, longer if I get distracted. I've been told that tea gets bitter if you let it steep for more than 5 minutes, but I've never noticed mine doing that unless I'm not using filtered water.

After it steeps, I fill the pitchers with cool water from the filter and fish out the tea and herbs. I put them in my "compost bucket", which is actually a little bucket that I put kitchen scraps in for the chickens. They love tea leaves! If it is getting near tomato planting time, I will leave them out to dry so I can put a bundle under my tomato plants along with crumbled egg shells. The tomatoes love them too!

Then I pour it into my Grama ba-ba (as Grampa Tom calls it) and sip on it all day long. Hey! I spill it enough with a lid on!
God Bless You All!
~Grama Sue
Apple Sauce
Growing up, my mom used to go to the store and buy huge jars or cans of applesauce for our large family which we kids slurped right down. I loved it, I mean applesauce is wonderful stuff right? Then I married into a family that had apple trees. My mother-in-law showed me how to make applesauce and well ... How in the world do those commercial applesauce makers manage to take all the flavor out of applesauce??????? They must juice it first and then use the leftovers to make it. One taste of real applesauce and you'll never go back!
Start with real apples. Green or yellow apples generally make the best applesauce if you follow my method. The skins contribute their color to the applesauce. If you are making apple butter or want to go through all the work of peeling the apples, it doesn't make a whole lot of difference. At least that's my opinion. Martha Stewart might disagree, but I'm a country girl, not a gourmet chef.

Wash your whole apples and then cut them in half.

Remove the stems and the blossom ends. I'm told they make the applesauce bitter, though I've never tried it. Sounds reasonable so I'll accept this bit of passed down wisdom!

Remove any bruised or bad spots.

And two year old bites :) Actually I was surprised. I only found bites on this one red apple that he picked up first. I was really having to keep after him not to bite any other apples. There have been years when I've had to remove a multitude of two year old bites. They will typically take one bite out of any they can get their hands on.

Actually, you wouldn't even have to cut the apples in half if it weren't for the fact that every now and then you will run across an apple that a bug has penetrated. In that case just quarter it and cut out the core. Otherwise it isn't necessary to core the apples.

I always like to save some of the seeds. Last year I wound up with a lot of bleeding due to fibroid tumors. According to all the research I've done, fibroids are pretty common for women my age and most of them clear up on their own within 2 or 3 years. Apple seeds contain B17. B17 is very good for any type of tumor. I've been eating a few apple seeds every day since I learned about it. As long as I don't forget for days on end, I don't have problems with unusual bleeding. Amazing!

An electric roaster is a pretty good fit for a 5 gallon bucket of apples. You can use a smaller pan on the stove if you don't have a huge amount of apples.

Fill the pan and add enough water to cover about 2/3 of the apples. Cover and cook until the apples are soft. If you can be right there to stir often, turn up the heat. That will make the process faster.

When the apples are soft, uncover and cook off the water until the applesauce is the desired consistency. This will be about 1/2 the original volume.

Now you will need a colander. This is my favorite one. It has a handle that turns around while the metal piece pushes the applesauce through the holes, leaving the skins, core and seeds behind.

This is the one my kids grew up with. You place it in a big bowl and use the wooden plunger to push the applesauce through the holes. It works OK, but it is harder to handle. Not to mention that it is really easy for ambitious energetic children to splash applesauce on the ceiling with it.

Spoon the cooked apples into the colander and push it through. With this one you need to turn it clockwise several times and then do a quick counter-clockwise or two when it gets clogged up. If you are using a cone-type colander, you have to stop every now and then and scrape it with a spatula.

You can empty the colander when you think you've got most of the saucy part in the bowl or you can just keep adding more apples until you are done. With this colander, I'm prone to keep adding, but the cone type tends to get a little hard to handle if you don't empty it now and then.

This is what I have left over from my 5 gallon bucket of apples. It will go to my chickens. They love it!

I don't have a big enough bowl to put all the applesauce in at once, so I do have to stop and put it into containers 2 or 3 times during the straining process. If the apples are somewhat tart, you can stir in honey or sugar or whatever sweetener you prefer to taste. I like to use my big yogurt containers or plastic peanut butter jars. When I'm deciding what containers to use, I choose a container that is a size we will eat in one or two meals. It also has to have a wide mouth. If you don't have a wide mouth to serve it partially thawed. There's just nothing better than frozen applesauce! It makes great popsicles too! I use masking tape to label and date my containers and put it in the freezer for later.

I have canned applesauce if it looks like I'm going to run out of freezer space. There are glass jars that are made for the freezer. I only have a few of these jars. This is one I use for bacon drippings, but I'd love to have a bunch of them for applesauce. You could can lots of shelves full and put one or 2 in the freezer at a time.

I got about 15 pounds of applesauce out of my 5 gallon bucket of apples and an ice cream bucket of scraps for my chickens! Mmmm good!

God Bless You All!
~Grama Sue
Subscribe to:
Posts (Atom)